
Commercial timber floor restoration is as much about planning the site as it is about sanding the floor. The Freshwater Senior Campus project is a useful example: the work took place in an active education setting, and the finished photos show how a tired floor can become a clean, practical surface again when the scope, access and finish are considered together.
This case study is based on the project photographs. They show the campus entry, restoration work in progress and completed floorboards in the restored rooms. The exact floor area, timber species, coating system and programme were not supplied, so those details are intentionally not guessed here. For a commercial quote, those are the items that need to be confirmed on site.
What the Freshwater project shows
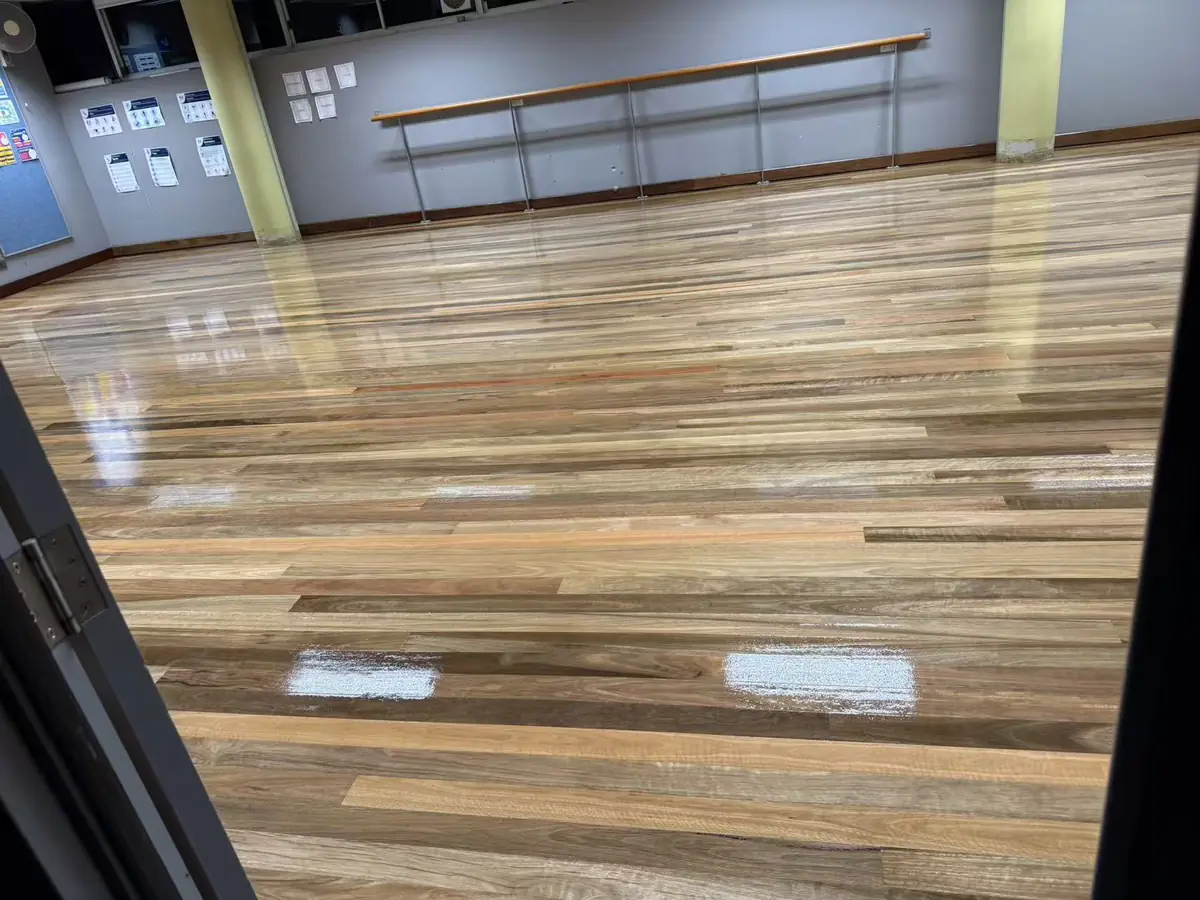
The photographs tell a clear before-and-after story without relying on a generic showroom image. One image identifies the campus, another shows the floor during restoration with sanding equipment in the room, and the final views show the completed boards across a larger room. That sequence gives facilities teams and property decision-makers a more useful way to assess the result: it shows the setting, the work, and the finished surface.
It also shows why commercial flooring should be assessed as part of the wider building. Columns, mirrors, skirting boards, handrails, doors, furniture, lighting and pedestrian routes all affect how work is isolated and handed back. A good restoration plan protects the surrounding space while keeping the agreed area clear for the flooring team.
Why schools and commercial sites need a different plan
A home and a campus may both have timber boards, but the operating conditions are not the same. A school, office, community facility or retail site normally has more people moving through the building, stricter access requirements and less flexibility to leave an area unfinished. The quote and programme should therefore answer practical questions before work starts:
- Which rooms, corridors or stair areas are included?
- How will the work zone be separated from students, staff, visitors or customers?
- What access, parking, keys, alarms and delivery arrangements apply?
- Can furniture and equipment be moved, or must the scope work around them?
- When will the surface be safe to walk on and ready for normal use?
- Who will inspect the completed area before the site is reopened?
These are not administrative extras. They influence the workable sequence, the handover and the risk of having to stop and restart the job.
A practical restoration sequence
1. Inspect the floor and the surrounding space
The first step is to identify the floor construction, existing finish, visible damage, board movement, stains, previous repairs and transitions to other surfaces. The inspection should also record access constraints and anything that could be affected by dust, vibration, equipment or temporary closure.
2. Agree the scope and site controls
Before the first sanding pass, the client and contractor should agree which areas are included, how the work will be isolated, what preparation is expected and how the space will be returned. For an education or commercial site, this may need to fit around term dates, operating hours, cleaning schedules or other contractors.
3. Prepare the boards and edges
Preparation can include clearing the area, protecting adjacent finishes, checking boards and dealing with edge conditions. The amount of preparation depends on the actual floor. A photograph can show overall wear, but an inspection is needed to confirm what is beneath the existing coating and around the perimeter.
4. Sand, repair and finish to the agreed specification
The sanding approach, repairs and finish should match the condition and use of the space. Colour, sheen, maintenance expectations and re-entry requirements should be discussed before the coating is applied. A finished floor can look dry before it has reached the stage where normal traffic, furniture or cleaning can return, so the handover instructions need to be clear.
5. Inspect and document the handover
A simple handover record can note the completed areas, any agreed exclusions, care instructions and the date the space is released. Before-and-after photographs are useful here because they provide a visual record for the facilities manager, owner or project file.
Does every worn commercial floor need full sanding?
No. If the timber is sound and the main problem is a dull or lightly worn protective coating, a screen-and-recoat may be a better way to refresh the surface while preserving more of the existing timber. Deep scratches, stains, coating failure, uneven timber or damage that reaches into the boards may require sanding, repairs or board replacement instead.
The right answer depends on the floor in front of you. Our guide to floor sanding versus recoating explains the signs to look for, while the commercial floor sanding service page outlines the type of work that can be planned for business and public-facing spaces.
What to include in a commercial flooring brief
A clearer brief helps a contractor prepare a more useful quote. Include:
- The site address and the type of building.
- Photos showing the whole floor, edges, transitions and any damaged areas.
- The rooms or zones to be treated, including stairs or connected corridors.
- Known access restrictions, operating hours and preferred work windows.
- Whether furniture, equipment or temporary barriers need to be considered.
- The desired colour, sheen and maintenance expectations, if already known.
- Who will approve the completed work and receive the care instructions.
For a school or facility, it is also helpful to identify the person who can answer questions quickly during the job. Small decisions about access or isolation are easier when responsibility is clear.
Why project photography matters
Real project photography helps a future client judge more than the shine of a finished floor. It shows whether the contractor has worked in a setting with built-in features, shared access and operational constraints. It also gives the client a record of the transformation that can be shared with an owner, committee or facilities team.
You can view the full set of Freshwater Senior Campus restoration photos in the project gallery. If you manage a school, office, strata building, community facility or other commercial property, send photos of the floor and explain the access constraints. That gives the flooring team a useful starting point before an on-site assessment.
Frequently asked questions
What should a school check before arranging floor restoration?
Confirm the areas included, access and isolation requirements, furniture handling, working hours, ventilation, finish selection and when the floor can safely return to normal use.
Can restoration be planned around school operations?
Often, yes, but the programme depends on access, room use, drying and curing requirements, furniture movement and the site's safety procedures. The schedule should be agreed after reviewing the actual areas and constraints.
What information is needed for a commercial quote?
Useful information includes the site location, floor photos, areas to be treated, access restrictions, operating hours, furniture or equipment constraints and the finish outcome you want. An inspection can then confirm the construction and condition of the floor.
Planning a commercial timber floor restoration?
Send us the site details and photos, or arrange an assessment so we can recommend the right scope for your building.
Request a Free Quoteor call 0466 058 951